hhfarang wrote:^ What Photoshop (I assume) function did you use to do that?
Not Photoshop, GIMP*
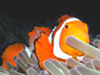
Easy explanation is the original image didn't use the full range of pure white to pure black so I expanded that range (also known as stretching the histogram), then made the sky bluer.
Histogram before and after. Pure black is on the far left, pure white on the far right (yes, the layout of histograms was designed by a Conservative :-)

- TwoLevels.jpg (13.93 KiB) Viewed 2091 times
Detailed explanation:
A. Made luminosity mask to isolate the darkest parts. Inverted the mask, used Levels to expand histogram.
B. Made luminosity mask to isolate the sky, used Levels to darken.
C. Combined A&B
D. Isolated the sky, used Curves to emulate Fuji Provia film, which was known for it's cool, translucent colors.
E. Combined C&D.
F. Sharpened E.
* GIMP is open source (free) software. Doesn't do much compared to Photoshop (PS). In PS a fix is often a button push followed by moving sliders to tweak. In GIMP it's done by hand - but it's a lot easier to use if one understands the hows and whys of what changes it's making to the image. Not recommended unless one wants a solid base upon which to build the use of other post processing tools.